


How to swap library styles with file’s local styles and components without breaking links and using paid plugins
Nov 02, 2022

When to use this method
The project has grown and there are many files in Figma, each with the same design system. You’ve created a library based on your design system and want to assign it to all existing files. But Figma only allows you to swap different libraries with each other and tells nothing about how to swap a library with local styles and components from the design system.
Next, we will cover how to do it in a way that doesn’t break the current styles, components, and their connections. And all this without using paid plugins!
Steps for implementing the library in an existing file
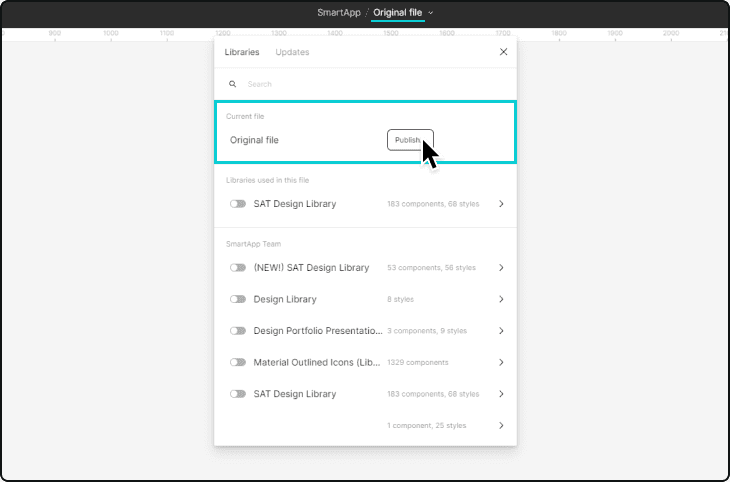
1. Open the file you want to assign the library’s styles and components to (hereafter, the original file).
2. Create a library in the original file from local styles and components (use Alt+3 for Windows, Option+3 for IOS, or Assets – Library and click “Publish”).
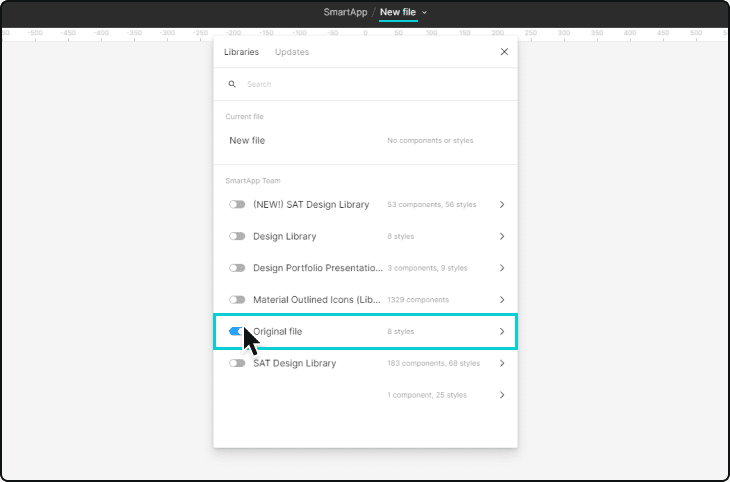
3. Create a new file.
4. Turn on the original file’s library in the new file.
5. Copy all the layouts from the original file and paste them into the new file page by page.
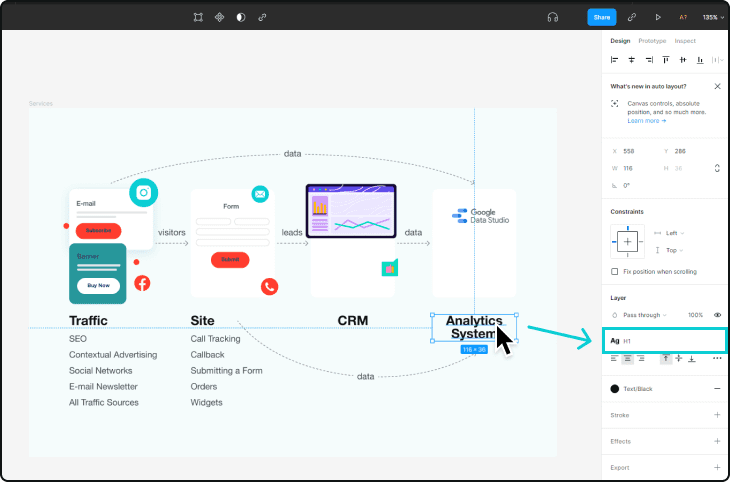
6. Note that you should have all the styles and components saved as in the original file. You can check it by clicking on some text and see whether the style is displayed or has broken. If the style is broken, please check the previous steps.
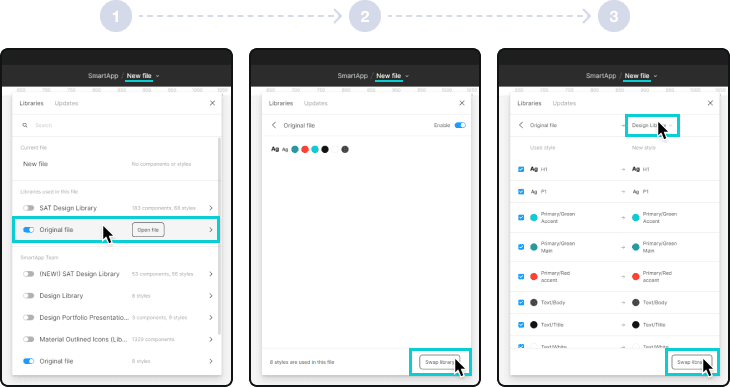
7. In the new file, go to the libraries (Alt+3 or Option+3), click the original file’s library, click the “Swap library”, select in “Choose library” your library that you want to implement (Design Library), click the “Swap library”. yourself from your competition?
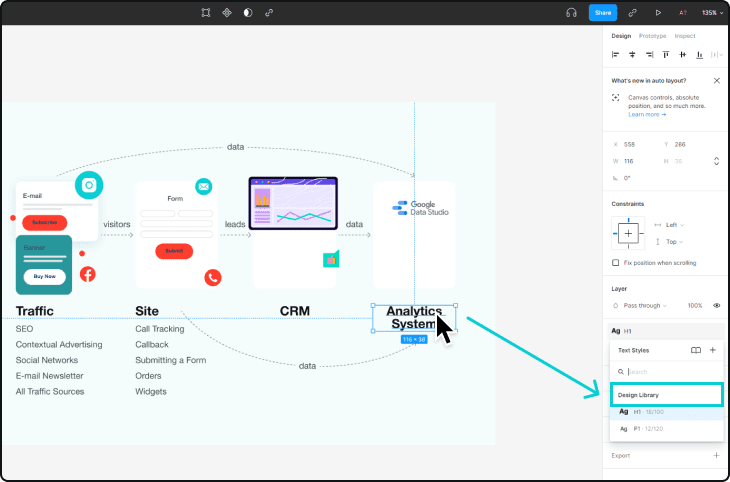
Note: Check the matches before clicking the “Swap libraries” one last time. Matching is based on the style or component name only. This includes components sets and the variants within them. If you’ve deleted components, or recreated them with different names, Figma won’t recognize or match these components.
8. Done! Your file now has styles and components from the library. You can check it by clicking on some text and see that the style belongs to your design library.
9. Delete the original file, you don’t need it anymore. Leave the new file.
Do the same with all the files you want to assign styles and components from the library. Your library process is now automated, and it’s easy to include the library in your future new files (just enable the library in the Library menu).
We hope you found our guide useful and that it helped you solve the problem. If you still have questions, please feel free to ask them in the comments below, and we’ll be happy to help. Also share if you succeeded, so other users can see that it works!
Didn’t find a solution?
If you have another swap libraries problem, we recommend checking out Figma’s guide.